This five-part series is aimed at those who would like to implement Arduino projects, but are not very familiar with the programming language and the Arduino IDE.
Part 1
It is often the case that hobbyists know electronics very well, but programming is still a problem. Numerous tutorials offer ready source code that you only have to load onto the microcontroller. You learn by try-and-error, but often do not understand what is happening in the program. If you then want to implement a more extensive project, you sometimes end up in a dead end. The following basics should help to ease the access to programming.
To transfer your own program to an Arduino microcontroller can be done in different ways. In our blog posts there are already instructions for installing and using the PlatformIO development environment. In this series of posts, we focus on the Arduino IDE, which is well suited for beginners.
What is needed?
• Computer (Windows, Linux, MacOS)
• Arduino microcontroller
• Mini-USB cable
On the website Arduino.cc Is the Arduino IDE (Integrated Development Environment:
Integrated Development Environment) is available for download. The platforms Windows (from Win XP upwards), MAC OS X (from 10.8), Linux 32 and 64 bit as well as Linux on ARM 32 and 64 bit are supported.
So one of these platforms would necessarily have to be available. The aforementioned website provides a web editor in Arduino Create, which will not be discussed further here.
Of course we want to program an Arduino compatible microcontroller. For this we use the Arduino Nano V3, which you get for free from us as a new customer. It has an integrated LED, which we can use later for the first test. The Nano is connected to the computer with a mini-USB cable. This supplies it with power and also transfers our program.
transferred through it.
Tip: Arduino.cc is a good place to start if you are stuck. Much of what is mentioned here is described there in more detail.
First step - Installation
First, of course, the Arduino IDE should be installed. The best way to do this is to run the Windows Installer and follow the instructions of the installation program.
A portable version is also available as an option. For Linux, download a packed .tar.xz file and unpack it afterwards. This can be done from the context menu via the right mouse button. Here one selects "Unpack here". In the folder that is then created, there is a file called install.sh, which is also started via the right mouse button and the command "Run in terminal". This is a shell script.
If you have already opened a terminal window, change to the folder you just unzipped and as an alternative start the installation with the command line ./install.sh. If there are problems with the authorization
you can add a sudo to the beginning of the line. If the file is then still not executable, it must be made executable with the command line sudo chmod +x install.sh. In case there are still problems with the installation, the user patrickthecreator has published a workaround for the Arduino IDE version 1.82 under Linux on the website instructables.com.
published.
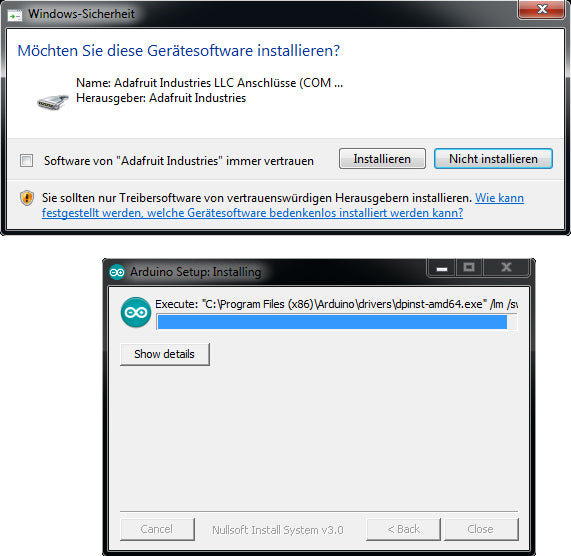 |
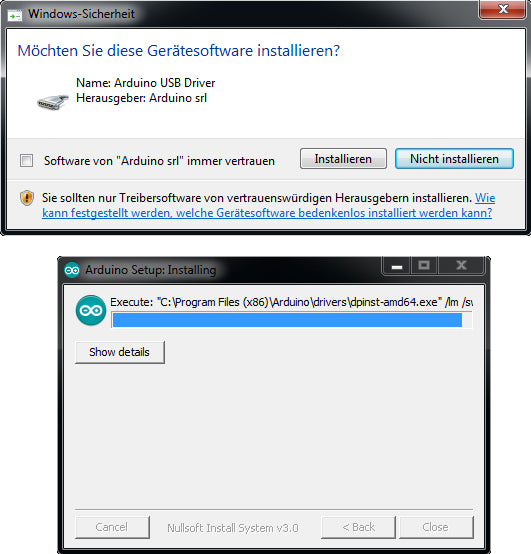
Figure 1: Installation Arduino IDE - driver
 |
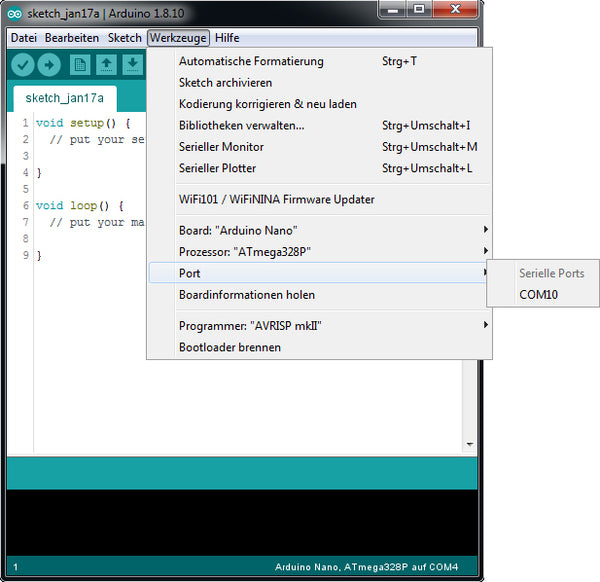
If the installation was successful, the Arduino Nano is connected to the computer via mini USB cable and the IDE is started. The starting order is irrelevant. You may have to select the port manually in the program under the menu item "Tools", connect the Arduino only after the program start.
Under certain circumstances a driver is needed under Windows, so that the Arduino is recognized. USB (Universal Serial Bus) is a form of serial interface. If an Arduino is connected, it is assigned to the COM port. If you use the Windows Installer, the required drivers are usually installed at the same time. It is possible that the nano is still not recognized. Possibly there is an Arduino Nano with CH340/CH341 chip. If you enter this into the internet search of your trust, you will quickly find it. The problem is well known. Also under Linux or Mac OS said problems can occur. If the Arduino is recognized, it appears under Windows as /COMx (instead of the x a number appears) and under Linux and Mac OS as /dev/tty or /dev/usb.
 |
Library management
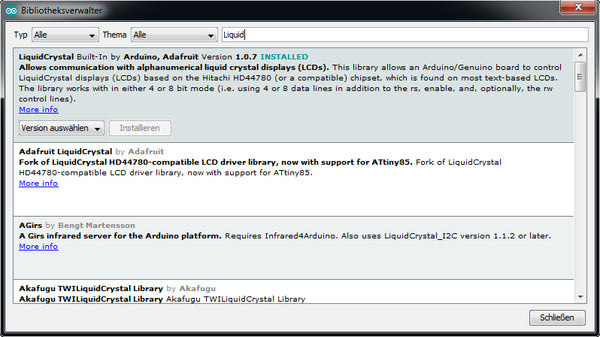
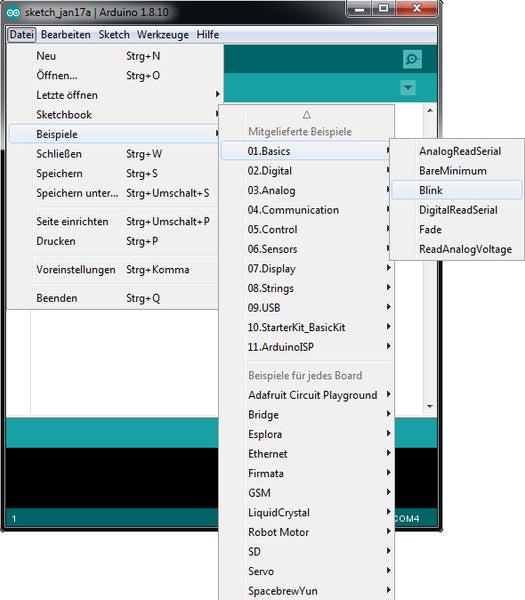
Numerous libraries are available. This means that ready-made program functions can be integrated and used. The Arduino IDE offers this in different ways. On the one hand, you can install numerous libraries from the online repository in the menu item "Tools" under "Manage libraries..." or CTRL+SHIFT+I. For example, if you want to use an LCD display, you can install the LiquidChrystal Library and have suitable functions available in a simple way as well as sample code, which can then be accessed via the menu "File" and then "Examples". In the Arduino IDE such a library is already installed. We can also see this in the administration.
 |
 |
#include <LiquidCrystal.h>
LiquidCrystal lcd(rs, en, d4, d5, d6, d7);
It is now possible to initialize the display with lcd.begin(16, 2); (16, 2 stands for 16 columns and 2 rows. For larger or smaller displays you have to change these values) and then output text on it with lcd.print("hello, world!");. There are some other functions available in this class. It should only be clarified, how one can include ready program modules.
The first program - Sketches
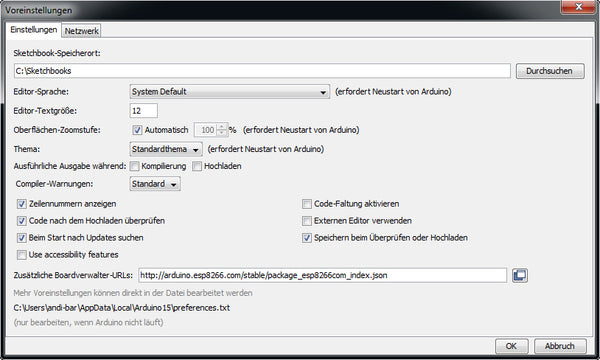
The Arduino IDE saves programs as so-called sketches. A folder "Sketchbooks" is created for this purpose. Hardware information and libraries that you manually add to the IDE are also stored there. Of course you can also choose your own locations. Sketches are stored as .ino file.
Tip: Make sure that the name of the file is identical to the name of the folder in which the file is located. If this is not the case, you will be kindly informed when saving or a folder with the name will be created independently.
 |
 |
This is how it goes:
Arduino Ide - Programming for beginners - [Part 2]
Arduino Ide - Programming for beginners - [Part 3]


25 commenti
Andreas Wolter
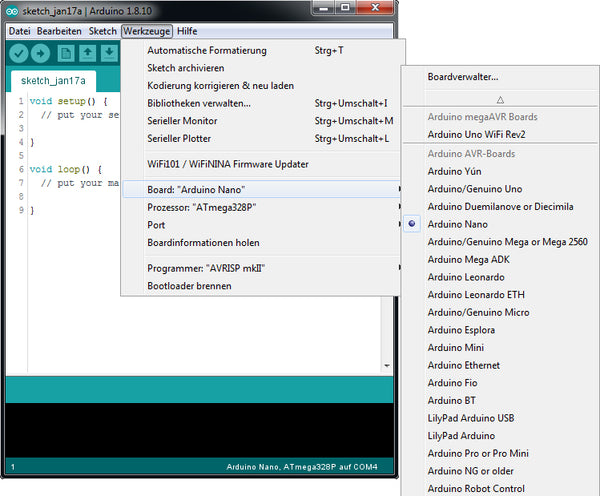
@Mario Geyer: Sie müssen zuerst in den Boardverwalter. Dort suchen Sie nach ESP und werden wahrscheinlich dann ESP32 sehen. Davon gibt es auch verschiedene Versionen. ES gibt leider immer wieder mal Probleme mit aktualisierten oder nicht aktualisierten Bibliotheken und den ESP Cores. Wenn Sie später Probleme haben, dann an dieser Stelle versuchen, die Version zu ändern.
Ansonsten, wenn Sie den ESP Core installiert haben, müsste dann unter Werkzeuge / Boards der ESP auszuwählen sein. Wenn Sie das getan haben, tauchen in den Beispielen die ESP Examples auf.
Grüße,
Andreas Wolter
AZ-Delivery Blog
Mario Geyer
Hallo Herr Wolter,
vielleicht können Sie mir helfen.
In der Arduino IDE Voreinstellungen habe ich folgende Einträge:
https://raw.githubusercontent.com/espressif/arduino-esp32/gh-pages/package_esp32_index.json
https://dl.espressif.com/dl/package_esp32_index.json
Gehe ich nun in Bibliotheken verwalten und gebe dort ESP32 ein kommt keine ESP32 von Espressif Systems, nur eine von Espressif die heisst ESP32_Display_Panel.
Ich kann zur Zeit keine ESP32 programmieren. Arduino IDE habe ich schon komplett neu installiert. Weiss nicht weiter? Haben Sie einen Tipp? Im Voraus Danke
Andreas Wolter
@Henry Winter: die anderen Beiträge wurden später veröffentlicht, weswegen sie hier nicht verlinkt werden konnten. Das werden wir bei Gelegenheit nachholen. Bis dahin finden Sie die weiteren Folgen dieser Reihe über die Suchfunktion: https://www.az-delivery.de/pages/search-results-page?q=einsteiger&tab=pages
Grüße,
Andreas Wolter
Henry Winter
Wenn man jetzt noch sehen könnte wo es weiter geht wäre das sehr schön …. :-)
Andreas Wolter
Nachtrag: die Beta Version gibt es aktuell nur in englischer Sprache. Daher bitte das Stable Release verwenden. Dort kann man dir Sprache umstellen.
Andreas Wolter
Die Arduino IDE bringt mehrere Sprachen mit. Man kann sie ändern unter Datei → Voreinstellungen (oder STRG + Komma) und dann Editor-Sprache.
Marcel Thommen
Wo finde ich eine Deutsche Version von Arduino
georg
Hallo Michael, habe auch Probleme mit der englischer Sprache und dein Beitrag wenn ich denn gut verstanden habe, finde super gut, halte mich an AZ-Delivery noch fest weil dort wird noch die deutsche Sprache verwendet, aber auch nicht immer, sehr schade. Nach Anweisungen klicke lings und rechts, nach oben und unten um am Ende landen meine Versuche im Papierkorb.
Lg, Georg
Patrick
Ich kann mich den Vorrednern nur anschließen. Tolle Sache, macht bitte weiter so!
DC8SE
Hallo zusammen,
ich finde die Teile 1 – 3 seeeehhhr gut.
Gibts das auch als PDF zum runter laden???? Oder noch besser als Buch
73
DC8SE
Stefan M. Caillet
Hallo liebes AZ-Delivery Team,
Ich finde diese Tutorials absolut Top. Genauso wie Eure E-Books. besonders lobenswert an den E-Books finde ich, dass sie im pdf. Format sind, sodass man sich zum lesen nicht noch extra nen e-Reader zulegen muss. Ihr stellt Damit und mit Euren Tutorials eine grosse Ausnahme unter den Electronic-Versendern dar, die meisten schmeissen einem die Module vor die Füsse und sagen ‘nun schau mal, wie du weiter kommst, wir verkaufen nur’.
Besonders Gut finde ich , dass eben alles in deutscher Sprache erklärt wird, weil es eben auch heute noch viele Anfänger (aber auch Fortgeschrittene) gibt, die eben des Englischen nicht mächtig sind.
Des weiteren erklärt ihr alles sehr Anfängerfreundlich sodass man alles nachvolziehen kann, ohne erst ein 1000 seitiges C++ Buch gelesen zu haben.
Bitte macht weiter so.
Liebe Grüsse
Stefan
David
Danke für das Tutorial. Schön wäre es, dies auch als PDF zur Verfügung zu stellen. Damit man später noch einmal nachlesen kann.
Hans-Jürgen Purps
Das ist doch mal eine sehr gute Idee. Ich hoffe, es wird zeitnah weiter geführt. Ich warte drauf…..
Ekkehard Kehmann
Seit einiger Zeit bin ich Kunde bei AZ-Delivery. Bisher waren alle gelieferten Bauteile in guter Qualität. Besonders aber habe ich mich über die guten E- Bücher gefreut. Sie sind ein passables Nachschlagewerk. Der jetzt beginnenden Serie über die Arduino- Familie finde ich sehr gut und bin auf die Fortsetzung gespannt. Die Arbeit, die hinter den unterstützenden Anleitungen steht, ist sicher immens. Es ist für mich ein Alleinstellungsmerkmal von AZ- Delivery im Feld der Elektronik- Versender. Ich fühle mich hier gut aufgehoben! Weiter so!
Stefan
Danke und weiter so.
Enrique Frias
Sehr gute Idee. Vielen Dank.
Andreas Wolter
@michael: die Arduino Referenz gibt es mittlerweile in deutscher Sprache.
Ich kann leider auch keinen Sprachbutton auf der Webseite finden. Gibst du aber statt “Arduino Reference” in die Suchmaschine deines Vertrauens “Arduino Referenz” ein, gelangst du auf die übersetzte deutsche Seite mit allen Erklärungen.
Gruß,
Andreas
Gerd
Toll. Finde ich großartig. Weiter so!
Peter
Leider wird auf die Probleme mit dem CH340 Treiber nicht näher eingegangen. Die Linux-Variante des CH340 Treibers, die man von der chinesischen Webseite herunterladen kann, lässt sich nicht kompilieren, man muss den Treiber erst nachbearbeiten. Hier wäre es schön, wenn Az-Delivery eine funktionierende Version mit Installationsanleitung bereitstellen würde.
Unter Windows musste der CH340 Treiber erst heruntergeladen und installiert werden. Während es dann unter Windows 10 lief, bin ich mit Windows 8.1 in ein ganz fieses Problem gelaufen: Zuerst lief der CH340 Treiber, aber nach dem nächsten Windows-Update nicht mehr, außerdem war mein Smartphone nicht mehr sichtbar. Nachdem ich zunächst keine Lösung für meinen Arduino Nano hatte, habe ich mir einen HW-598 CP2102 USB to TTL Converter bestellt. Nach langem Suchen bin ich auf den Blog https://www.borncity.com/blog/2017/03/10/microsofts-fix-fr-microsoft-wpd-2222016-120000-am-5-2-5326-4762-treiberproblem/ gestossen: Microsoft hatte einen defekten “Microsoft – WPD – 2/22/2016 12:00:00 AM – 5.2.5326.4762” Patch für Windows 7, Windows 8.1 und Windows 10 in die Updates aufgenommen. Dieser Patch wurde später für Windows 10 zurückgezogen, aber nicht für Windows 8.1 und Windows 7. Nach dem Entfernen dieses Updates gemäß dem Blog und Blacklisten dieses Updates läuft der CH340 Treiber auch unter meinem WIndows 8.1 problemlos
Schlabberle
Hallo,
an allen die englisch nicht so gut können, ein großteil der Befehle gibt es in deutscher Sprache.
HIER: https://www.arduino.cc/reference/de/
Udo vI
Für mich als Anfänger genau richtig. Sehr gut!
Es wäre noch besser wenn diese Anleitung noch als PDF o.ä. zum Download zur Verfügung gestellt werden könnte. Für den Offline-Fundus… ;-)
Vielen Dank.
H.König
Sehr gut , hoffentlich wird diese Einführung weiter geführt.
So können gleich die anschließenden Sketches in die Praxis
umgesetzt werden .
Danke.
michael
Super, der Anfang ist gemacht…..nur die Seite " arduino.cc " müßte noch in deutsch sein. Gibt leider immer noch User die der Sprache nicht mächtig sind.
Vielen Dank
Rolf Zimmermann
Perfekt….. genau darauf habe ich gewartet, gehofft.
Super…. Danke.
Yves Guidot
could you translate the site for french reader, at least ?